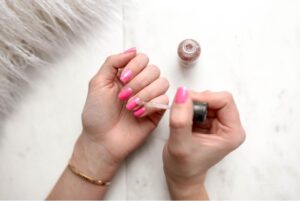
Who don’t want beautiful coloured nails? Nails can enhance your beauty and makes you look more shiner, confident and elegant. Are you thinking to try Nail art at home for short nails? You often see complicated tutorials of intricate designs on YouTube and other social media platform. There are many nail extensions also available, which are beautifully covered by nail art designs. Maintaining your beautiful nails is honestly the best accessory you can show off. Here, we have come up with six easy nail art designs step by step at home for short nails for our beautiful ladies!! So, Let’s get started-
Page Content-
- Easy Nail Art Design At Home
- 1. Tri Color Cliffs Nail Art
- 2. Bow Nail Art
- 3. Splatter Nail Art
- 4. Glitter V-Tip Nail Art
- 5. Pastel Daisies Nail Art
- 6. Stripes and Lines Nail Art
Easy Nail Art Design At Home-
1. Tri Color Cliffs Nail Art

This nail art is an overly straightforward and ideal decision for the individuals who begin using nail art. You needn’t bother with any additional tools separated from your hued nail colours for this super-straightforward nail art. This nail art is a simple nail art for short nails for beginners at home without tools. This simple nail art at home for short nails will be described using specific colours which are common, but it’s entirely up to your colour choices! Play around with your choice of colours!
Things You Will Need-
- Pastel blue nail polish
- Pink nail polish
- Blue nail polish
How To Apply?
- Right off the bat, apply a base coat to ensure your nails.
- Utilize pink nail polish to cover your nails.
- Now, Use the pastel blue shading to make a vertical stripe on the corner side, while leaving some space void close to the cuticle.
- Now apply nail paint from the middle, a little lower.
- Create the last stripe, again lower. You ought to have what looks at three stages.
- Repeat the same but starting from below and from the pastel blue.
- Do likewise with the blue nail polish.
- Seal this with a top coat and see you are done with nail art!
2. Bow Nail Art

This one is fantastic nail art designs for short nails at home. Since you have attempted above basic nail art, it’s an ideal opportunity to begin adding tools to get prettier nails. Try not to take the pressure; this is likewise a staggeringly straightforward nail art that you can easily do. It’s very casual also so it can be worn at all times. let’ check the steps-
Things You Will Need-
- Pink nail polish
- White nail polish
- Purple nail polish
- Nail striper or a very fine paintbrush
How To Apply?
- Start by painting the entirety of your nails with the white shade as your base shading.
- Paint over it with pink in a heart shape as appeared in the picture.
- Using a nail striper or a paintbrush sprinkled in purple nail polish, follow the shape where the white and pink meet and make two circles in the middle with the goal that it makes a shape like a bow.
- Finish it with a top coat, and you are ready to rock!
3. Splatter Nail Art

This one is for the craftsman covered up in you. You can make a lovely paint splatter configuration by using just a paintbrush! Yes!! By using a paintbrush. Let’s check the steps-
Things You Will Need
- White nail polish
- Light blue nail polish
- Purple nail polish
- Pink nail polish
- Yellow nail polish
- A stiff paintbrush
How To Apply?
- Apply a primary coat and paint all your nails with white as the base colour.
- Now comes the simple part. Locate a firm brush and dunk it in the light blue polish, and move your fingers through the brush and direct it at your nail with the goal that the brush evenly splatters nail paint on your nails.
- Rehash the same steps for the pink and the purple and yellow.
- Use a cotton ball soaked in nail polish remover to tidy up the sides around the nails.
- Seal it with a topcoat. Your splatter nail art is ready!!
4. Glitter V-Tip Nail Art
Hey, You’re invited to a party. But in such a short time, how can you manage your nails? Have booked your parlour appointment and stuck in other work? Don’t have time to schedule a visit to the parlour? No need to worry ladies! This nail art is perfect for the party occasion as they’re super easy to do when you are in rush. Let’s check the steps-
Things You Will Need
- Black nail polish
- Silver glitter nail polish
- A ‘V’ shaped sticker or a piece of tape.
How To Apply?
- Paint all your nails black as the foundation shading.
- Place the V sticker or a bit of tape close to the tips as appeared.
- Paint the base half with the silver sparkle nail polish.
- Wait for a minute to set the sparkle and afterwards cautiously pull away from the tape or sticker.
- Complete it with a topcoat, and you are ready to rock!
5. Pastel Daisies Nail Art

Ready to rock with your nail art game? This indeed looks so wonderful, and I’m edgy to offer this one a chance on my nails and propose you endeavour this also! This nail art design isn’t tough to attempt. You need to follow simple steps given below-
Things You Will Need
- Pastel pink nail polish
- White nail polish
- Gold studs, bindis, or gold polish.
- Gold glitter nail polish
- Dotting tool or a bobby pin
How To Apply?
- Right off the bat, On your crystal clean nails, apply a base coat.
- Then, apply the pastel pink polish to all your nails only except the ring finger.
- Spot a gold stud close to the fingernail skin of the record and pinky fingernails when your polish is as yet wet. This encourages it to stick on properly. On the off chance that you don’t have any studs or bindis, you can apply golden nail polish.
- We are moving onto the centre finger and thumb. Utilize a spotting instrument to make five dabs all around so it would seem that a daisy blossom. If you run out of the dotting tool, you can use the bobby pin.
- Put the gold stud or gold nail polish at the centre of the daisies you made.
- Now the ring finger is left only. Apply the gold nail polish first, and the sparkle glitter polish over that.
- Give a final touch with a topcoat, and there you go!
6. Stripes and Lines Nail Art

These fun mathematical patterns are sufficient to add a little style to your nails, and the best part is they are excessively simple to do. It would be best if you had a little persistence and time for this one; nonetheless, the outcome is legitimized, regardless of all the difficulty. You can pick any shade of your choice- Let’s check the steps-
Things You Will Need
- White blue nail polish
- Black nail polish
- Tape
How To Apply?
- Start with the white as your base.
- When it is scorched, you can start the placement of your tape according to the shape or line you need.
- For example, On the pinky and index finger, place tape diagonally.
- Cut up slender stripes to place on the ring finger.
- Create an ‘Angular’ shape from the tape for the middle finger.
- Similarly, make a plan for the thumb finger.
- Now, paint over the tape stencils you just made with dark nail polish.
- Please wait for a minute so the nail polish will dry a little and afterwards cautiously eliminate the tape and seal it with topcoat.
- Yeah! You are done!
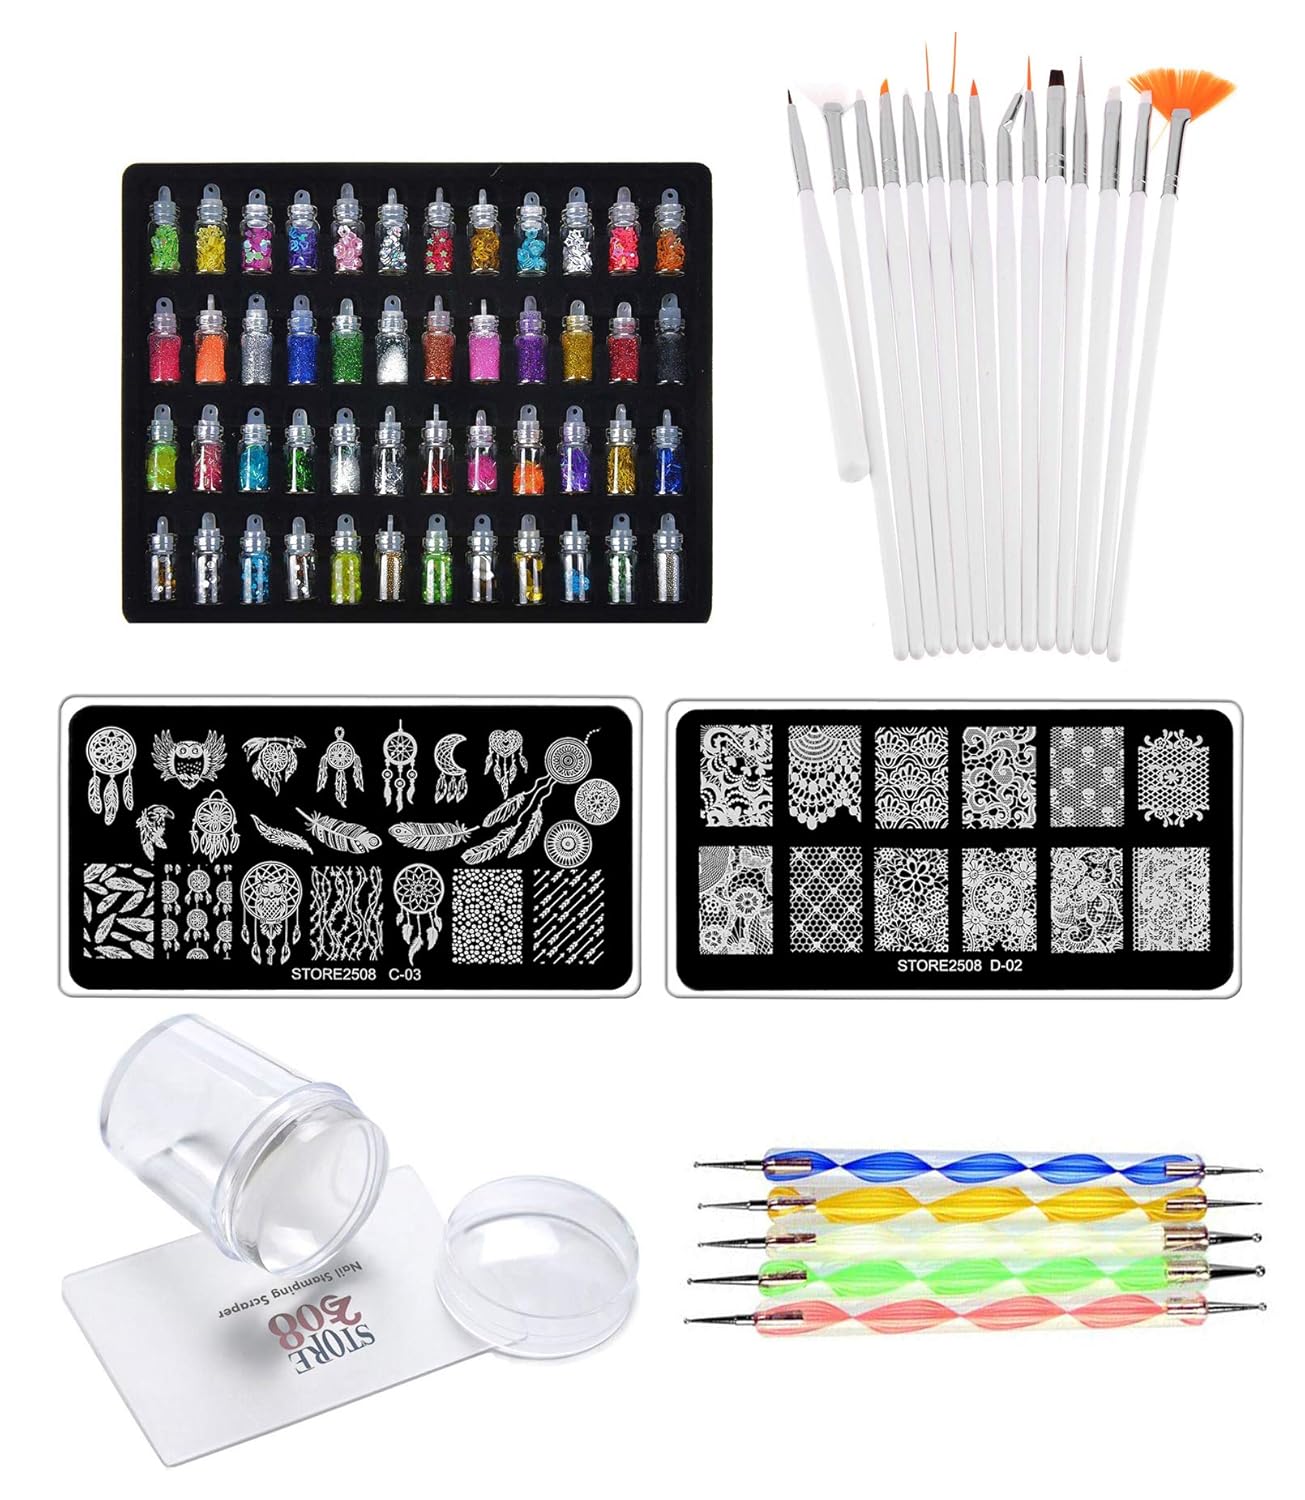
For our readers, Here’s a bonus tip- Get your own nail art kit to make your nail art design in much professional way. Try this out-
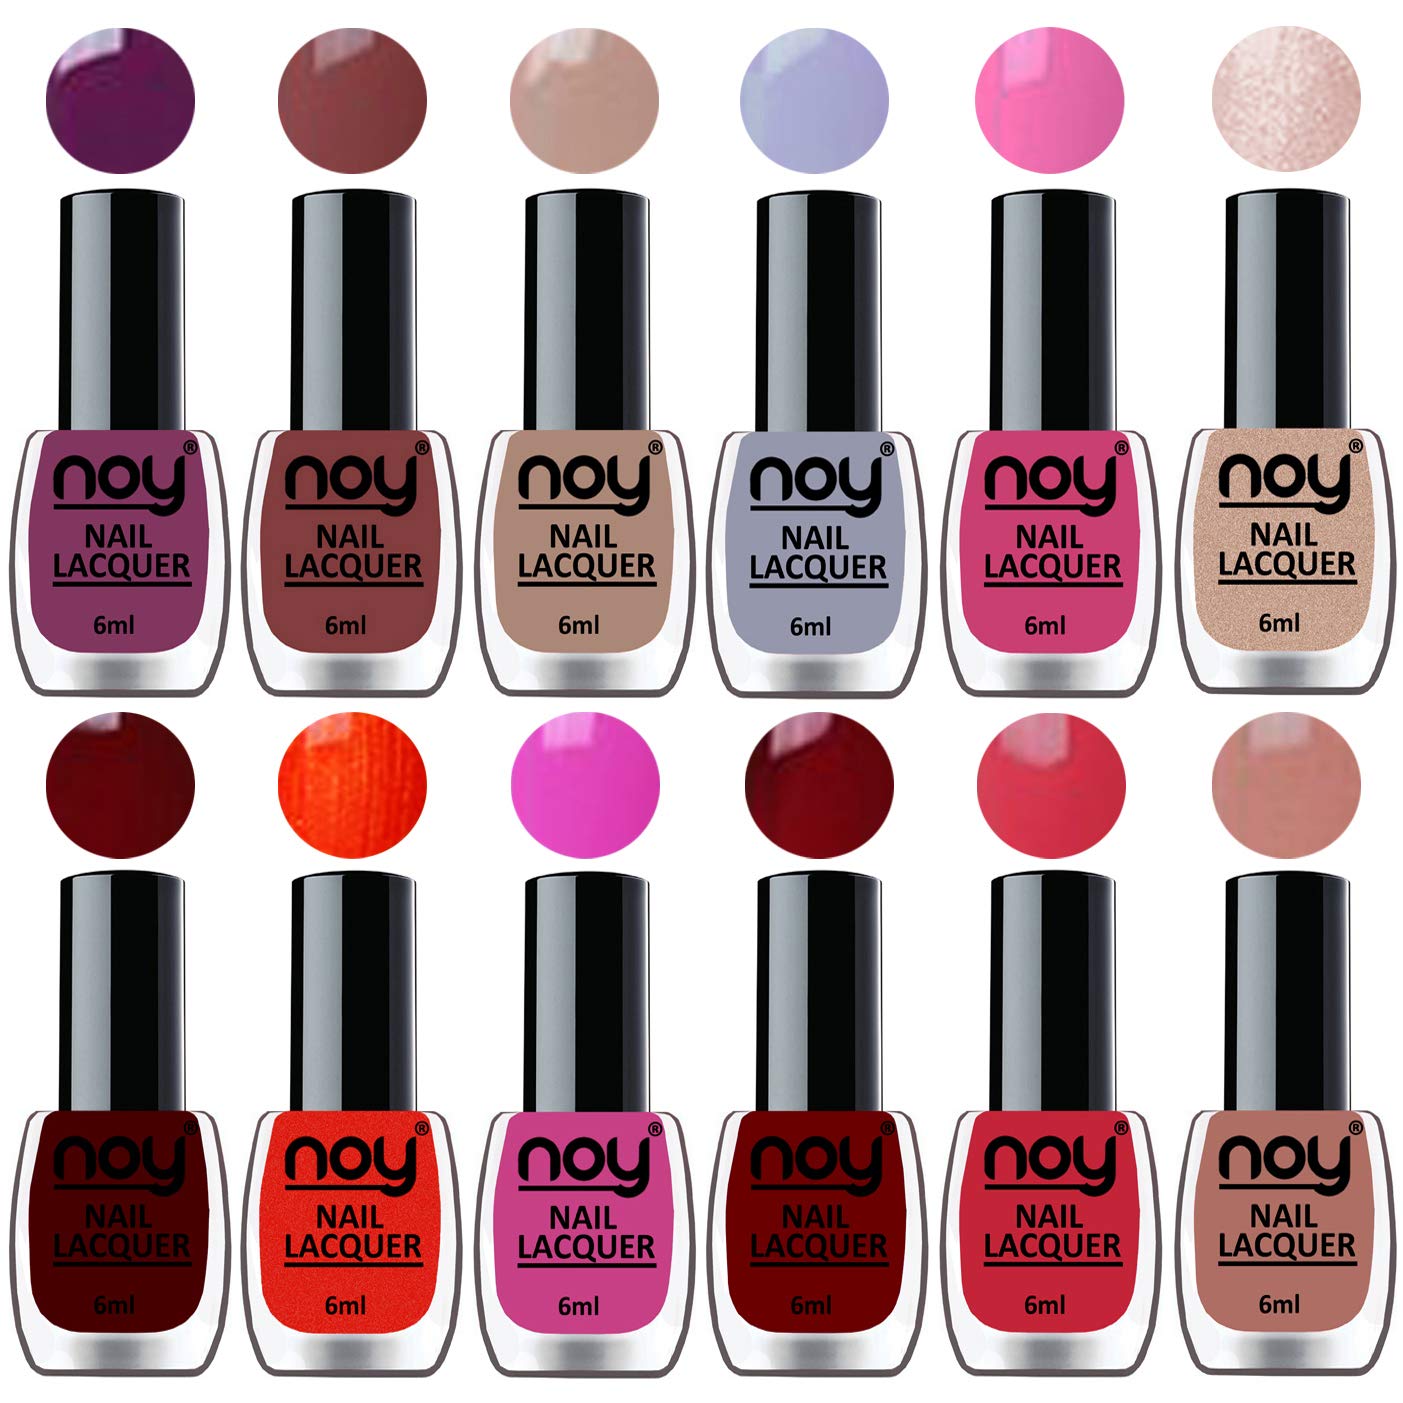
Stuck in between choosing the right colours for your nails. Try this nail polish set-
Wonderful Colored nails can include more sparkle in your magnificence. Hope you will try these simple nail art designs for short nails at home. Let us know in the comment box, which nails art design you found easier and best suitable for you. If you have more easy nail art at home for short nails, share with us. We feel happy to add-on more in the list. And do not miss to share it with your near and dear ones.
Also read– How to Make Nails Grow Faster in 2020
74 thoughts on “6 Easy Nail Art At Home for Short Nails”
I agree with your point of view, your article has given me a lot of help and benefited me a lot. Thanks. Hope you continue to write such excellent articles.
Your point of view caught my eye and was very interesting. Thanks. I have a question for you.
I don’t think the title of your article matches the content lol. Just kidding, mainly because I had some doubts after reading the article.
I’m really enjoying the design and layout of your blog. It’s a very easyon the eyes which makes it much more enjoyable for meto come here and visit more often. Did you hire out a developer to create your theme?Exceptional work!
Thanks for the blog post. Will read on…
Im thankful for the blog.Really looking forward to read more. Fantastic.
Hello my friend! I wish to say that this article is amazing, nice written and include almost all vital infos. I’d like to see more posts like this.
I haven’t checked in here for some time because I thought it was getting boring, but the last few posts are great quality so I guess I will add you back to my everyday bloglist. You deserve it my friend 🙂
Thanks a lot for the article post.Really thank you! Awesome.
best essay service – academic writing article help me write essay
modafinil controlled substance provigil for concentration how to use why won’t medicare pay for prescribed modafinil?
You could definitely see your skills within the work you write. The world hopes for even more passionate writers such as you who aren at afraid to say how they believe. All the time follow your heart.
You could definitely see your enthusiasm in the work you write.The arena hopes for even more passionate writers such asyou who are not afraid to say how they believe. Always go after your heart.
I identified what I used to be seeking for. excellent post, thanks
how to write a 5 paragraph essaywriting essays for college applicationsmla essay title format
As seen in The Evening Standard, Metro, Daily Express, Cosmopolitan, Yahoo, Health and Wellbeing and many more
I think this is a real great article post.Thanks Again. Cool.
wow, awesome blog article. Great.
I truly appreciate this post.Much thanks again.
Wow, great blog.Much thanks again.
I was suggested this blog by my cousin. I’m not sure whether this post is written by him as nobody else know such detailed about my trouble. You’re wonderful! Thanks!
After I initially left a comment I appear to have clicked on the -Notify me when new comments are added- checkbox and now every time a comment is added I get 4 emails with the same comment. Is there a way you can remove me from that service? Thanks!
Hello, I check your blog on a regular basis. Your humoristic style is awesome, keep it up!
Enjoyed every bit of your blog article. Great.
What’s Going down i am new to this, I stumbled upon thisI’ve discovered It absolutely helpful and it has aided me out loads.I’m hoping to give a contribution & aid different users like itshelped me. Good job.
Thank you for some other informative blog. The place else may I am getting that type of info written in such an ideal means? I’ve a mission that I’m just now working on, and I have been at the look out for such info.
I needed to thank you for this wonderful read!! I absolutely loved every bit of it. I have you book-marked to look at new stuff you postÖ
ivermectin for ringworm ivermectin wormer for horses
Hey, you used to write excellent, but the last few posts have been kinda boring?K I miss your great writings. Past few posts are just a little bit out of track! come on!
online thesis writing – custom research paper writing my canadian pharmacy
generic ivermectin generic ivermectin cream
Thanks for every other magnificent post. Where else could anyoneget that kind of information in such an ideal way of writing?I have a presentation subsequent week, andI am on the search for such info.
Hmm is anyone else encountering problems with the images on this blog loading?I’m trying to figure out if its a problem on my end or if it’s the blog.Any responses would be greatly appreciated.
I really like it when people get together and share views. Great blog, keep it up.
Great, thanks for sharing this post. Really Great.
It’s like you’re on a mission to save me time and money!
Its touch enabled and metro tiles features are making the news. Technologizer’s Harry McCracken has a list of what is still missing in the Windows 8 preview. You additionally test allows you to from Sound options.
This is my first time pay a visit at here and i am reallyhappy to read everthing at single place.
I blog frequently and I seriously thank you foryour information. This article has truly peaked my interest.I will bookmark your blog and keep checking for new details about once per week.I opted in for your Feed too.
If some one needs expert view about blogging afterward i suggesthim/her to visit this blog, Keep up the pleasant job.
A large number of good most people desire to make the decision to slip on replica rolex.
Greetings! Very helpful advice in this particular article! It is the little changes that make the largest changes. Thanks a lot for sharing!
Thanks for sharing your thoughts about judi online.Regards
Great, thanks for sharing this article post.Thanks Again. Really Great.
Hi friends, how is the whole thing, and what you would like to say regarding this pieceof writing, in my view its genuinely remarkable in supportof me.
Hey! Do you know if they make any plugins to safeguard against hackers?I’m kinda paranoid about losing everything I’ve workedhard on. Any suggestions?
Obrigado por compartilhar. Estou preocupado por não ter ideias criativas. É o seu artigo que me deixa cheio de esperança. Obrigado. Mas, eu tenho uma pergunta, você pode me ajudar?
Im thankful for the article post.Thanks Again. Awesome.
demodectic mange treatment ivermectin topical ivermectin for dogs
Really enjoyed this blog. Cool.
prednisone online for sale prednisone pills – prednisone purchase canada
, indicated that the app’s privacy practices could embrace handling of information as described below.
iver mectin stromectol purchase what is ivermectin used for humans
Great blog article.Thanks Again. Want more.
canadian pharmacy reviews consumer reports pharmacy com
You completed a number of fine points there. I did a search on the topic and found a good number of folks will consent with your blog.
Position well considered!.writing a college entrance essay essay writer best resume writing services online
After three hours of torturous torment for Val and Arya, after drinking the coffee provided by mother, they were both able to leave the house.
Really informative post.Really thank you! Want more.
I appreciate you sharing this article. Great.
Nice read, I just passed this onto a colleague who was doing some research on that. And he actually bought me lunch as I found it for him smile Thus let me rephrase that: Thanks for lunch!
An interesting discussion is worth comment. There’s no doubt that thatyou should publish more about this subject matter, it might not be a taboo matter but usuallypeople don’t discuss these topics. To the next! Many thanks!!
Thanks designed for sharing such a fastidious thought, article is fastidious,thats why i have read it entirely
Is anyone here in a position to recommend Jewelled Butt Plugs? Thanks xox
It’s hard to come by educated people for this topic, however, you seem like you know what you’re talking about! Thanks
apply for cvs pharmacy online safety of canadian pharmacies
I think this is a real great article.Much thanks again. Want more.
Muchos Gracias for your blog.Thanks Again. Want more.
Hi! Do you know if they make any plugins to assist with SEO?I’m trying to get my blog to rank for some targeted keywords but I’m not seeing very good results.If you know of any please share. Many thanks!my blog – looking skin
Appreciate you sharing, great blog article.
Howdy! This blog post couldn’t be written any better!Going through this post reminds me of my previous roommate!He always kept preaching about this. I’ll send this post to him.Fairly certain he’s going to have a greatread. Thanks for sharing!
Thank you, I’ve just been looking for information approximately this subject for a while andyours is the best I’ve came upon so far. But, what in regards to the conclusion? Areyou sure concerning the supply?
Looking forward to reading more. Great blog.Thanks Again. Cool.
Generally I don’t read post on blogs, however I wish to say that this write-up very forced me to try and do so! Your writing style has been amazed me. Thanks, quite nice article.